How to start selling on Google shopping for free

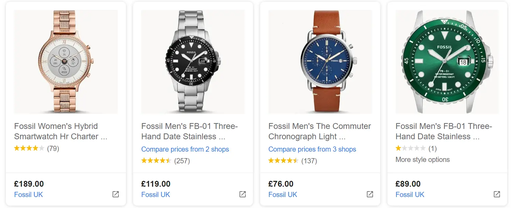
Google shopping is the leading eCommerce marketing platform. It gives retailers access to millions of shoppers, providing a valuable opportunity for revenue generation. It also offers retailers high levels of control, allowing them to fine-tune their campaigns to detailed precision.
Despite Google Shopping being a paid service for the past 8 years, in light of the Coronavirus, Google has decided to change things up, making now a better time than ever to leverage Google Shopping for your business.
Beginning immediately, Google Shopping search results will consist primarily of free product listings, as part of their Google Surfaces and Local Google Surfaces programs. Despite the current pandemic having an impact on Google making this decision, rest assured it is a permanent decision.
In this blog, we’re going to cover the basics necessary to get your products on Google Shopping.
Google Merchant Center
Google Merchant center is positioned to help get your business and product information into Google and make it available for shoppers across Google. It allows Google to store and manage your shop’s product data, making it fundamental to supporting Google Shopping, Shopping Actions, and local inventory ads.
With Google, setting up a Google Merchant account is free and easy.

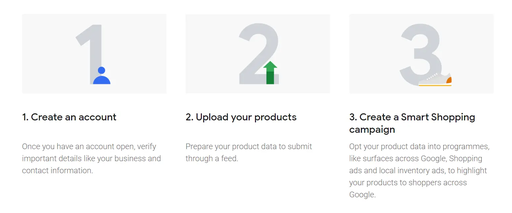
Despite being registered, before you can start using specific programs in the Merchant Center, you will need to verify and claim your business's website URL. By verifying your website, it lets Google know that you’re an authorised owner of a website domain.
All that’s left now is to create your product feeds and link your Merchant Center with Google Ads (if you intend to run local inventory ads, then a Google My Business account must also be linked).
If you have an existing primary feed configured in the Merchant Center, all you need to do is go into its settings and add Surfaces across Google and Local Google Surfaces as destinations.
If you don’t already have a feed, let’s create one now.
Create a primary feed in Merchant Center
1. When in Merchant Center, using the left-hand navigation menu, click on Products > Feeds
2. Select Add a primary feed
3. Choose the appropriate country and language (usually the country your business is located)
4. When selecting destinations, select Surfaces across Google and Local Google Surfaces (if you have a physical shop and want to advertise current product stock levels)
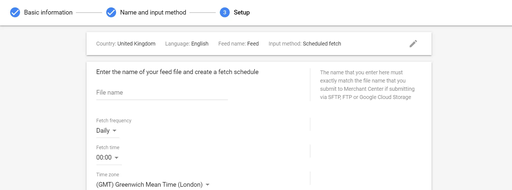
5. Name your feed
6. Select the method you wish to use to connect your product data to Merchant Center; you have the options of Google Sheets, scheduled fetch, website crawl, Google content API or upload.
7. Depending on your method of upload, you may be prompted to enter the exact name of the file you’ll be submitting. This is important as if it’s entered incorrectly, Google may struggle to import your product feed, causing errors.

Create a supplementary feed
Supplemental feeds provide additional data that can be connected to existing product data in the primary feed.
To use a supplemental feed, connect it to an existing primary feed through the id attribute.
1. Navigate to Products > Feeds in the Merchant center
2. At the top of the supplemental feeds table, select Add a supplemental feed
3. Input method; choose whether to input product data using Google Sheets, scheduled fetch, or upload.
4. Depending on which input method you select, you may be prompted to enter the name of the file that you’ll be submitting. As before with the primary feed, this name should match the file name and include a valid extension.
5. Now, select the primary feed to which this supplemental feed will belong, ensuring to also input your country and language combination.
To determine whether you have created and linked your supplementary feed correctly, head over to the feed rules section of Merchant Center. If done correctly, there should be a rule connecting the product data from the two feeds based on the id value provided.
Create a local product inventory feed
The local products inventory feed is a list of the products that you sell in your physical shop.
1. Navigate to Products > Feeds in the Merchant Center
2. At the top of the supplemental feeds table, select Add local product inventory feed
3. Name your feed - use a descriptive name that allows you to understand the content
4. Input method; choose whether to input product data using scheduled fetch or upload.
5. Depending on which input method you select, you may be prompted to enter the name of the file that you’ll be submitting. As before with the primary feed, this name should match the file name and include a valid extension.
6. If you chose scheduled fetch as your input method, you will need to specify when you wish the fetch to be scheduled
Creating a local product inventory feed is essential to take advantage of Local Google Surfaces and Local Inventory Surfaces.
Link your Merchant Center account with Google Ads
With both Merchant Center and Google Ads accounts, you can take advantage of retail-centric Google Ads campaign tools and the data-centric power of Merchant Center to improve your visibility on the web.
When you approve a link between your Google Ads and Merchant Center accounts, you’ll allow your product data to flow from Merchant Center to Google Ads for use in advertising campaigns. Using the data you submit, you can create Shopping campaigns to advertise your products.
1. In your Merchant Center account, go to the three-dot icon drop-down menu and then select Account linking
2. Select Google Ads
3. Under Your Google Ads Account, find the Google Ads customer ID of the account that you want to link to. This customer ID can be found at the top of any Google Ads page when you’re signed in.
4. Click Link
When a Merchant Center account sends you a request to link, the invitations will appear in the table on the Linked accounts page for Merchant Center in Google Ads or in the notification menu.
To approve a link request in Google Ads:
1. Sign in to your Google Ads account
2. Click the tools icon in the upper-right hand corner of your Google Ads account
3. Under Setup, click linked accounts
4. Under Google Merchant Center, click details
5. Find the account that you want to link. The ‘Status’ column will say ‘Pending’. Click View details in the ‘actions’ column and review the request details
6. To approve the link, click approve
Configure your preferences
You can adjust the types of emails that each user of a Merchant Center account will receive. You can choose from mandatory service announcements, tips and best practises, surveys and beta invites, opportunities, orders, and product data alerts.
Product data alerts are the most valuable in this instance, followed closely by order alerts. Product data alerts are email notifications that you’ll receive when something unexpected happens with your product data. This could be the number of active items dropping significantly. For this reason, we recommend having this notification turned on. Whilst you can view the same data in the Diagnostics section of your account, the data may be delayed. Product data alerts allow Google to notify you by email as soon as a problem arises.
To change your preferences in Merchant Center:
1. Sign in to your Merchant Center account
2. Click the tools icon, then select Preferences which is an option under settings
3. Under ‘email notifications’, simply toggle the switches for which emails you would like to receive
4. Click save
Leverage Google for retail
Once you have created your Merchant Center account, you have opted into Surfaces across Google, and you’ve linked your product catalog, your products will become eligible to appear across all of Google - for free.
Just remember, your listings are only as good as your data – take a look at Google's best practices. This will become more apparent as more businesses take advantage of this new medium.
Grasp this opportunity and launch your free listings, but don’t forget about paid Shopping ads, which can compliment your new free advertisements.
If you would like to learn more about setting up either a free Google Shopping Campaign, or a paid Google Shopping Campaign, contact our professionals.

